How to Propagate Angel Wing Begonias
Angel Wing Begonias are a beautiful addition to any garden. Now learn how to propagate angel wing begonias to grow your garden.
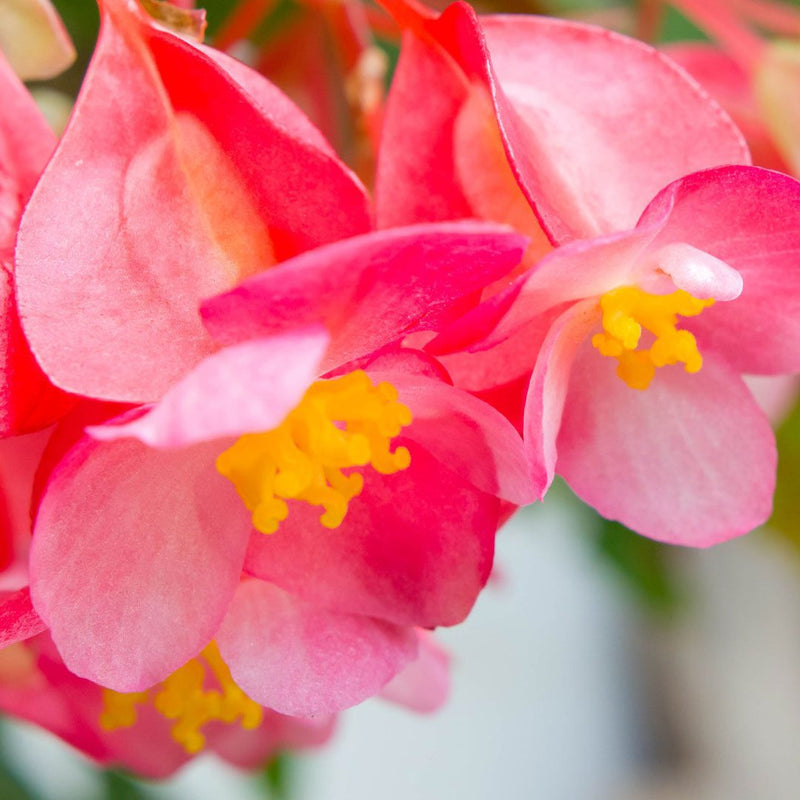
Angel Wing Begonias are a beautiful addition to any garden, but what happens when you want even more of them? Propagation is the answer! Not only is it an easy process, but it also saves money. It’s basically a way for you to get a never-ending supply of Angel Wing Begonias, and who doesn’t love that?
Propagating Angel Wing Begonias is a simple process that involves taking cuttings from the parent plant and growing them into new ones. This method allows you to create multiple plants from just one, saving you money and time.
Timing is crucial when propagating Angel Wing Begonias. The best time to propagate these plants is during the spring or early summer months. During this period, the plants are actively growing and have enough energy reserves to support new growth from cuttings. It is possible to propagate begonias other times of the year, but you may have less success, especially because some begonias go dormant in the winter, and if you try to propagate during this time, the stem will likely just rot.
Before you take your cutting, make sure the plant you’re taking it from is healthy. A healthy plant will give you better propagation results, whereas an unhealthy plant will likely thwart your efforts of propagation.
When selecting a stem for cutting, look for a healthy stem that’s at least 4-6 inches long with several leaves attached. It’s important to use sharp, clean, and disinfected pruning shears to avoid damaging the plant.
Once you have your cutting, remove any lower leaves and make sure your cut is just below a node (the spot where leaves emerge). If there is any amount of stem below the lowest node on your cutting, you’ll want to cut it again closer to the node.
After this, dip the end of the cutting in rooting hormone, either powder or liquid. This step is not a requirement, but it does help speed up the rooting process, which in turn helps your new cutting avoid any rot from sitting in damp conditions.
From here, you can either propagate your cutting in water or in soil.
Propagation in water is one of the easiest and most popular methods for propagating Angel Wing Begonias. All you need for this process is a glass jar with clean, de-chlorinated water. We prefer a clear glass jar, not only because it’s more hygienic, but also because you can easily see when new roots sprout, and you can more easily track how well your cutting is doing!
Once you have this jar, all you have to do is place your cutting with the rooting hormone into the jar of water so that only the stem is submerged. Don’t allow any of the leaves to get submerged in the water, as this may lead to rot or mold forming on the leaves, which can quickly kill your delicate begonia cutting.
Change the water every 2-3 days until it’s time to pot your cutting in soil after the roots have grown. You do not need to reapply rooting hormone, but you can for the first few water changes if you’d like to.
To propagate your cutting in soil, you first need to start with high-quality, well-drained soil. The quality of your soil will greatly impact how successful your propagation will be. Make sure the soil you are using is already hydrated. Do not place your new cutting into soil that is dry.
After you have your soil in a small pot, simply place the cut end of your cutting into the soil, about an inch or two deep. Pat down the soil around the stem to secure it in place, and give your cutting a good watering. Keep the soil moist until you begin to see new growth above the soil, and then you can go down to a regular watering schedule.
Rooting time can vary depending on several factors such as temperature and humidity levels, light exposure, and the overall health of the plant. Typically, it takes around 4-6 weeks for begonia cuttings to start showing roots. However, this timeline may differ based on environmental factors. If you’re propagating during colder months or in a region with low humidity levels, rooting may take longer than usual.
To ensure successful propagation and healthy growth of your new plants, make sure to keep an eye on their progress regularly. Check for signs of root growth by gently tugging at the cutting or inspecting its base for emerging roots.
While waiting for root development, be sure to maintain consistent moisture levels in both water-propagated and soil-propagated cuttings. This will help prevent wilting or rotting before roots have had a chance to develop fully.
Remember that patience is key when propagating Angel Wing Begonias – it’s worth waiting until your cuttings show robust root systems before potting them up into bigger containers!
Potting on is an essential step in the propagation process of Angel Wing Begonias. Once your cuttings have developed roots, they need to be potted in their own pots to grow out even more. This will give them enough space to grow and thrive, and turn into little begonia plants.
When potting on your begonias, choose a pot that is slightly larger than their current one. A good rule of thumb is to go up by two inches in diameter. Make sure the new pot has drainage holes at the bottom.
If you’re potting on from a water propagated begonia, a good size pot to start with is about 6-8 inches in diameter.
Fill the bottom of the new pot with fresh potting soil, then carefully remove your cutting from its old container. Gently loosen any tangled roots before placing it into the new soil. Add more soil around the root ball until it reaches just below the rim of the new pot. Press down gently to secure your cutting in place.
When placing your plant in its pot, try to give the roots space; don’t just set the whole cutting in the pot, allowing the roots to sit on top of each other. Hold the stem up so just the bottom of the roots are touching the soil at the bottom of your pot, and then fill in soil around the hanging roots. This will ensure your roots have a better chance of spreading out and pulling the nutrients from the soil.
Water your newly potted begonia thoroughly and place it in a bright location with filtered sunlight. Keep an eye on moisture levels and adjust watering as needed. From here, you simply treat your cutting like a brand new begonia plant!

Caring for begonias after propagation is crucial to ensure that the newly propagated plants grow and thrive. Even though your cutting has made significant progress, and is now its own little plant, it is still fragile, so you’ll want to keep your begonia on a good care schedule to ensure it continues to thrive.
Light is essential for the growth and development of Angel Wing Begonias. These plants require bright, indirect light to thrive. Direct sunlight can burn their foliage, so it’s best to keep them in a spot where they get plenty of filtered light.
Indoor growers may want to consider providing artificial lighting if natural light isn’t sufficient. Grow lights or fluorescent bulbs can be used to supplement the amount of light your begonias receive. Keep in mind that too much artificial lighting can also harm these plants, so be careful not to overdo it.
As a general rule of thumb, aim for 12-16 hours of bright but indirect light per day for optimal growth and health of your Angel Wing Begonia plant. Regularly monitoring its location and adjusting when necessary will ensure that your begonia thrives under ideal lighting conditions.
Watering is an essential aspect of angel wing begonia care, especially for a freshly propagated one. The key to successful propagation is keeping the soil moist, and only watering when the top of the soil has dried out.
When watering your newly propagated begonias, it’s important to avoid overwatering or letting the soil dry out completely. Overwatering can lead to root rot and other fungal diseases, while allowing the soil to dry out can cause stress on the plant and hinder its growth.
To prevent these issues, feel the top of the soil regularly. Whenever the top layer of soil feels dry to the touch, it’s time to water your plant. You can also use a moisture meter to ensure you’re watering your begonia when it needs it, and not before. Use room temperature water and avoid getting any water on the leaves as this can lead to spotting or damage.
It’s also important not to let your plants sit in standing water as this can suffocate their roots. Always make sure that excess water drains away from their pots after watering. A pot with good drainage will help you prevent this, but if you keep your plant’s pot on a tray to catch the drainage, empty that tray often so the bottom of the soil isn’t sitting in the water.
Angel Wing Begonias thrive in warm temperatures between 60-75°F (15-24°C), so it’s essential to maintain a consistent temperature not only throughout the propagation process, but for the life of your plant.
Avoid placing your begonia plant in drafty areas or near air conditioning units, as this can cause fluctuations in temperature that may not be ideal for your begonia’s growth.
Additionally, proper humidity levels are crucial to help your begonia thrive. The ideal range for Angel Wing Begonias is between 50-70% humidity. If humidity around your plant is difficult to keep up, here are a few ways you can increase it easily:
You can always use a humidity meter to monitor humidity levels for your plant, also. Maintaining the right temperature and humidity levels is key to ensuring healthy growth of your propagated Angel Wing Begonias.

All plants benefit from regular fertilizing, and newly propagated begonias are no exception. In fact, it’s crucial that your begonia gets the proper nutrients during the beginning stages of its life as a new plant.
Use a balanced liquid fertilizer diluted to half strength every two weeks or so during the growing season. Go down to only about every 2-3 months during fall and winter so your plant doesn’t get more nutrients than it needs.
It’s important not to over-fertilize, as this can cause damage or even kill your plant. One of the easiest ways to prevent over-fertilization is by switching your fertilizer out for a balanced, indoor plant food. Plant food is designed to be given to your plant every time you water it, and it provides your plant with the perfect amount of nutrients that it can absorb quickly, entirely preventing any fertilizer burn.
With proper care and attention during propagation and beyond, Angel Wing Begonias can provide years of beauty and enjoyment in your home or garden. So get out there, propagate some cuttings, and start enjoying these lovely plants today!
Looking for more houseplant info? We highly recommend our super informative (and FREE!) Houseplants for Beginners Webinar. Check out our community of other plant lovers in our Facebook group. And if you’re looking for handy go-to reference for all your houseplant needs, check out our The Last Houseplant Book You Will Ever Need.


We are an Amazon Certified Small Business! Small businesses are the backbone of the US economy; they create jobs and drive innovation. We appreciate YOU helping small businesses on Amazon!

