How To Propagate Hoya

Hoya is a stunning perennial flowering plant in the plant family Apocynaceae. Many species are popular houseplants because they are easy to grow, require little care, and are rather easy to propagate, so if you’re looking for a plant to add to your indoor jungle that keeps on giving beautiful plants for years to come, hoya might be the perfect choice.
Hoya plants are easy to propagate from stem cuttings, but you will need to collect some tools before beginning. Grab the tools from the list below and keep reading for a step-by-step guide on how to propagate your hoya.
To propagate Hoya, you will need the following tools and equipment:
– Clean, sterile cutting shears
– A small pot or container for planting
– Perlite, vermiculite, sand, or other growing medium
Set out all of your tools and make sure your shears are sterile. You can wipe them off with a bleach/water solution or hydrogen peroxide. If you’ve decided to create your own potting mix, have it mixed before taking your cutting. You could also opt for a pre-made mixture specifically made for indoor plants such as this indoor potting soil.
Propagating from a stem cutting is the best way to propagate your hoya, and it’s very simple to do. Simply grab your tools from the list above, follow the steps below, and you’ll have as many propagated hoya plants as you can fit in your home!
To take a stem cutting from a Hoya plant, first choose a healthy stem that is at least 6 inches long with 3-4 leaves. Cut the stem just below a leaf node (the point where leaves are attached to the stem) with your sterilized cutting shears, and remove the bottom set of leaves. Make sure the finished cutting has at least 2-3 healthy leaves.
Next, dip the cut end of the stem in rooting hormone powder or gel. This will help encourage root growth. It is not required in order to get root growth, but it helps speed up the process and helps the plant get stronger faster. From here, you can either place your cutting in soil or in a jar with just water to root.
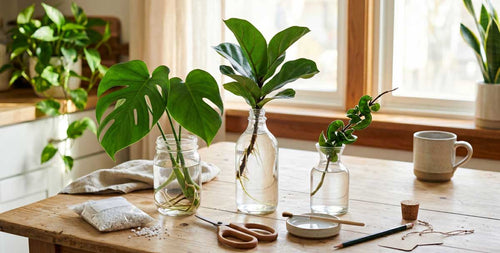
To root your hoya in water, all you have to do is simply fill your container with clean water and place your cutting in the water. Don’t submerge the leaves that are still attached to the cutting, as that would encourage rot to form on the leaves.
Put the glass or jar in a sunny spot and wait for new roots to grow. This can take anywhere from a few weeks to a few months. You will want to replace the water every 2-3 days to give your cutting the best chance to grow new roots. You don’t need to reapply rooting hormone at every water change.
Once your cutting has rooted, you can transplant it into soil.
Rooting hoya in soil is still the preferred method, even though water propagation is popular and easy to do as well. Simply fill your container with a well-draining potting mix, and make a small hole in the soil where your cutting is going to go. Put the cutting into the hole at least an inch down and lightly press the soil around it.
Water the cutting well and place it in a bright spot out of direct sunlight. Keep the soil moist but not soggy and in about six weeks you should see new growth.

After you have successfully propagated your Hoya, it is important to care for it properly to ensure that it thrives. Keep in mind that this plant is native to tropical and subtropical Asia, so replicating a similar environment for your plant will help it thrive in your home. Here are some tips for caring for your Hoya after propagation:
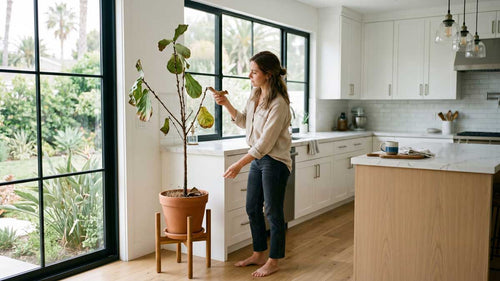
Keep your newly propagated hoya in a bright spot that does not receive direct sunlight. Once your new plant has become established and new growth is visible, your plant should be able to handle some direct sunlight, but not a lot. You may need to move your plant around your home to find the perfect spot for it.
Hoya’s like warmer temperatures, and will do best in a space where the temperature is kept above 60 degrees year-round. If you have cold winters, you’ll also want to keep this plant away from windows during the colder months. If the leaves accidentally touch the window while it’s cold outside, they could get too cold and begin dying.
Maintaining a humid environment for them is important as well, and will help your plant thrive in your home. Placing a humidifier close by or using a humidity tray would help give your plant the right amount of humidity every day.
There are two main types of soil that can be used for your hoya plant: sphagnum moss and potting mix. Sphagnum moss is a type of peat moss that is very absorbent and holds moisture well. It can be used on its own or mixed with perlite or vermiculite to create a lighter, well-draining mixture. Potting mix contains ingredients like perlite or vermiculite to create a lighter, well-draining mixture.
During spring and summer, your hoya will grow quickly and will need to be watered regularly. Water your hoya when the top layer of soil has dried out. During the fall and winter, your plant will naturally grow much slower, and will require less watering. In those months, it’s okay to reduce watering to only when the top inch of soil has dried out.

Fertilizers are a great option for Hoyas because they provide a slow release of nutrients into the soil. This means that your plants will have a consistent supply of food, which is essential for proper growth. To make fertilizing easier, you could opt instead to feed your plant a balanced plant food at every watering instead of a fertilizer every month or two. This takes the guesswork out of fertilizing and ensures your hoya gets the nutrients it needs more steadily.
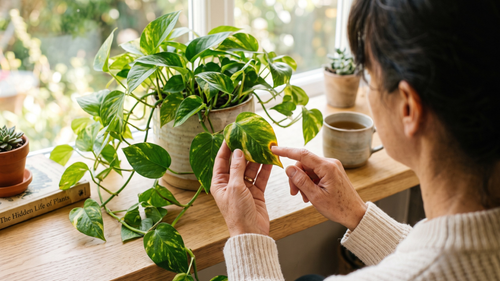
One of the most common problems after propagation is that the leaves of the hoya plant may turn yellow and fall off. This is usually because of a lack of water or nutrients, so be sure to monitor your plant and water it regularly.
Another common problem is that the stem of the hoya plant becomes brittle and breaks easily. This is often caused by too much sun exposure, so place your propagated hoya somewhere that receives indirect light only.
Last, hoya plants can sometimes get fungal diseases which will cause the leaves to turn brown and drop off. If you see any signs of this, be sure to treat your plant with a fungicide as soon as possible.
Hoya plants are typically propagated from stem cuttings, but it is possible to propagate them from leaves. To do this, you will need to take a leaf cutting from the plant and place it in moist sand or soil. The cutting should be placed in indirect light and kept warm. After a few weeks, the cutting will develop roots and can be transplanted into potting soil.
There are several reasons a hoya cutting doesn’t root. If the cutting wasn’t taken from a healthy plant, it’s unlikely to root, and if the cutting wasn’t done correctly or there was too much damage to the stem while taking the cutting, it also may not root.
Finally, the conditions need to be right for propagation. The cutting should be placed either in a jar with clean water or in moistened potting mix and kept in a warm, humid environment.
Propagating your own plants can be a rewarding experience, and can quickly fill your home with many new, beautiful plants. Hoyas are an excellent plant to learn how to propagate with, so grab your plant and try it!
Looking for more houseplant info? We highly recommend our super informative (and FREE!) Houseplants for Beginners Webinar. Check out our community of other plant lovers in our Facebook group. And if you’re looking for handy go-to reference for all your houseplant needs, check out our The Last Houseplant Book You Will Ever Need.


We are an Amazon Certified Small Business! Small businesses are the backbone of the US economy; they create jobs and drive innovation. We appreciate YOU helping small businesses on Amazon!