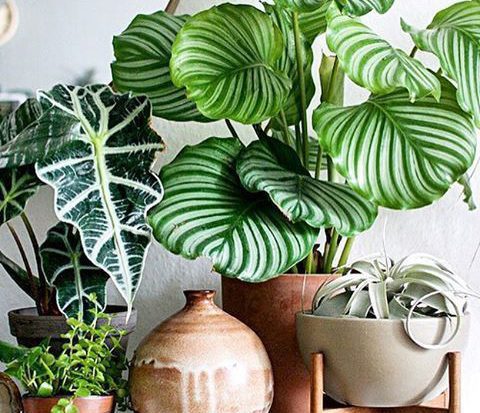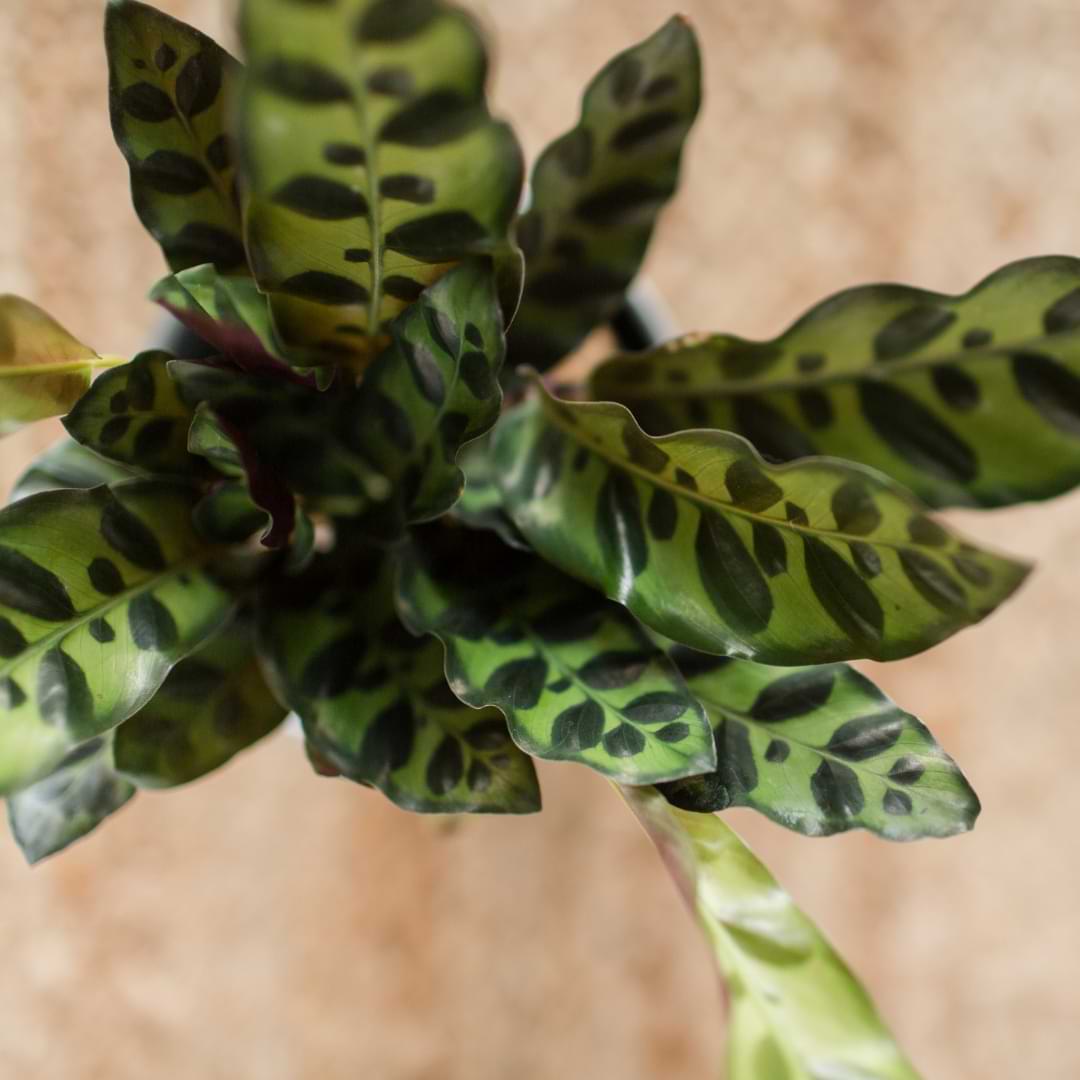
The rattlesnake plant, or Calathea lancifolia, is a stunning calathea variety known for its long, wavy, lance-shaped leaves with dark-green spots and beautiful purple undersides. Native to the tropical rainforests of Brazil, this plant can grow up to 30 inches tall and looks incredible on a tabletop or as a floor plant.
While rattlesnake plants aren’t the best choice for complete houseplant beginners, they’re a great next step if you’ve gotten the hang of caring for more easygoing plants (like pothos, snake plants, and philodendrons) and are ready to move on to something a little more challenging. Overall, rattlesnake plants are relatively simple to care for if you have a little experience with indoor plants.
So how do you grow one of these showstopping plants and maintain its striking coloring? Here’s everything you need to know about rattlesnake plant care.
Table of Contents
Rattlesnake Plant Care: Here’s What You Need to Know
Soil and Potting
Rattlesnake plants really don’t like standing water, so you’ll want to make sure to choose a pot with drainage holes. However, if you find a decorative planter without drainage holes that you simply MUST have, you can use one of our favorite tricks: double potting.
To do this, pot your rattlesnake plant in a cheap plastic pot with drainage and place it inside the decorative pot. When you water the plant, simply remove the inner pot and water, then leave it to drain in the sink, tub, or shower for a couple hours before replacing it in the planter. Houseplant hacks for the win!
While wet feet are a no-go for this plant, your rattlesnake plant also likes consistently, evenly moist (but not soaked) soil. Make sure to choose a soil that drains well but doesn’t dry out too quickly, and is a little on the acidic side (a pH of 5.5 to 7, if you want to get specific).
Cactus soil can be a good choice, and you can also try mixing a few handfuls of perlite or orchid bark into indoor potting mix.
Rattlesnake plants are moderate growers, so plan on repotting every year or two to encourage growth and freshen up the soil. If the soil becomes compacted, you notice roots growing out the top or bottom, or if the plant becomes root-wrapped, it might be time to repot, even if it’s only been a few months since you last repotted.
Light and Placement
Rattlesnake plants prefer light conditions similar to what they’d enjoy on the floor of the rainforests where they originate, which means filtered or bright, indirect sunlight.
Place your rattlesnake near a bright window where it may get some morning sun, but where the afternoon sun won’t shine directly on the leaves. You can try filtering the light with sheer curtains if necessary. An east-facing window is a great choice, and a south- or west-facing window can also work if you use curtains or place the plant a few feet back where it won’t receive direct sunlight.
Proper sunlight is crucial for maintaining the rattlesnake plant’s bright colors. Too much light can cause the dark-green spots to fade with too little light, or even scorch the leaves and cause them to shrivel. If your plant gets too little light, the coloring may appear dull, and your plant may stop growing and experience overwatering issues.
Rattlesnake plants can tolerate lower light than a lot of other tropical plants, so it’s best to err on the side of lower light than placing your plant in light that’s too bright and risk scorching.
Water
Here’s where rattlesnake plant care can get tricky: rattlesnake plants do best in evenly moist soil, but they don’t like being waterlogged or too dry.
This means you should water when the surface of the soil feels dry, or about once a week (or even more if you live in a dry area). At most, you can let the top inch of soil dry out before your plant will start launching a rebellion.
Some rattlesnake plant owners do fine with watering thoroughly once per week while others prefer to water lighty a few times per week to maintain consistent soil moisture. Your preference depends on your lifestyle, your plant, and how well your pot and soil drain.
This is also why drainage is such a huge deal. If your soil takes more than a week to dry out, your soil probably isn’t draining well, and you might notice yellowing or even browning leaves. If your soil drains too quickly, you might find yourself watering almost every day!
We advise checking your plant daily and watering when you notice it’s dry rather than sticking to a specific watering schedule. You can do this with a finger test or by using a moisture meter and watering when it reads 4.
When it’s time to water, you can add water to the top of the soil and let it drain, or give bottom watering a try.
Humidity and Temperature
As tropical plants, rattlesnake plants like warm, humid conditions similar to what you’d find in their native rainforests. The closer you can replicate these conditions, the happier your plant will be!
Ideal temperatures for a rattlesnake plant fall between 65 and 75 degrees Fahrenheit, and try to keep temps as steady as possible. This plant isn’t a fan of dramatic temperature fluctuations! On that same note, make sure to keep your plant far from drafts, air conditioners, heaters, fireplaces, and vents that can freeze, scorch, or dry out the leaves.
Your plant will also appreciate consistent humidity as well. A steamy bathroom is a great place for a rattlesnake plant, but you might also get good results from a humidity tray. You can buy these online or at stores where plants are sold, but you can also make your own by filling a shallow tray with water and pebbles and sticking your rattlesnake plant’s pot on top. (Just make sure the roots don’t touch the water.) As the water evaporates, it will create some humidity around your plant’s leaves.
Humidifiers can also provide a little more humidity for your rattlesnake plant, and misting regularly is also a good idea.
Creating the right environment can be tricky, but if you pull it off, your plant will reward you with lots of beautiful, healthy leaves!
Fertilizer
Your rattlesnake plant will need a steady supply of nutrients starting a few months after you bring it home, since a healthy, growing plant can easily use up all the nutrients in its potting soil in just a couple months.
Fertilizer regularly with a gentle, balanced liquid fertilizer. In the winter when your plant might be dormant, you can fertilize ⅓-½ as often or even quit altogether. However, many houseplant owners find that their plants grow in spurts all year instead of experiencing extended seasons of growth and dormancy. If this seems to be the case with your plant, you may be able to fertilize year-round to support your plant’s growth.
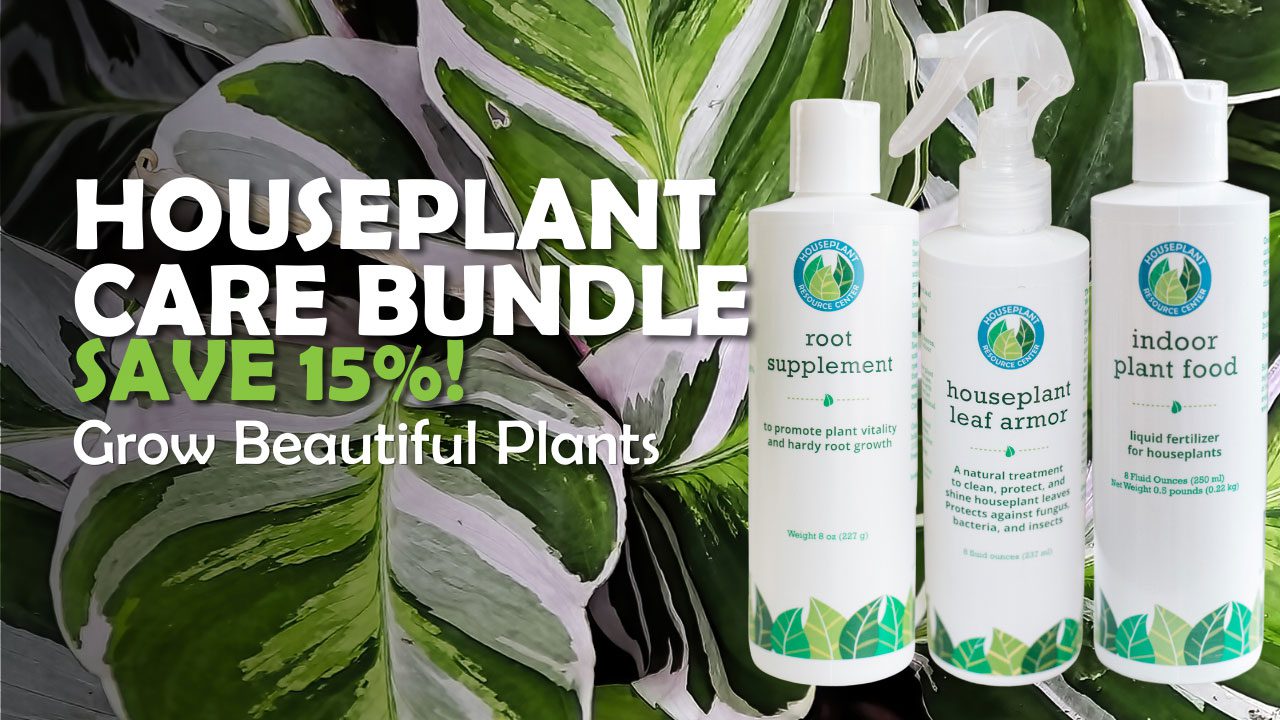
We recommend Indoor Plant Food because it’s gentle enough to use every time you water your rattlesnake plant. This reduces the risk of both over- and under-fertilization because you won’t have to remember a fertilization schedule and accidentally fertilize too often or not often enough! It just makes things easier.
The best part is, this fertilizer also works great for your other houseplants. (Just don’t use it on succulents. They have their own thing going on and have completely different nutrient requirements from tropical plants.) I just add some to my watering can every watering day and all my plants love it!
Propagation
You can propagate your rattlesnake plant through separation, which is also a great way to manage its size if you don’t want it to grow too wide.
The best time to do this is when you’re already repotting. Simply unpot the plant by tipping the pot on its side and carefully wheedling the plant out. You can use a butter knife to gently lever the root ball out, or squeeze the pot a little if it’s a flexible plastic pot.
When you’ve removed the plant from its pot, carefully untangle the root ball until you have two or more smaller plants. If the root ball is tightly wound and untangling just isn’t going to work, use a sharp, clean knife or pruning shears to cut the root ball apart.
When you have your smaller plants, pot each in its own smaller pot that’s just a few inches larger than the root ball and water thoroughly. Then care for the plants like you would a mature rattlesnake plant. The roots will be sensitive for a few weeks, so it might like a little (emphasis on “little”) more indirect light than usual to help it recover, and hold off on fertilizing for a month or so while the roots heal. The leaves might be a little droopy for a week or two, but with consistent care and a little patience, it will recover.
Troubleshooting
No matter how carefully you care for your rattlesnake plant, you might run into some problems from time to time. Here are the most common signs of trouble to watch out for and what to do if you see them.
Yellowing leaves: Your rattlesnake plant is probably overwatered. Make sure the pot and soil drain well and that you aren’t keeping the soil soaked, just damp. Your plant might also need a little more indirect light, which can help with an overwatering problem.
Fading colors: Your rattlesnake plant is probably getting too much sunlight. Try scooting the pot back a few feet from the window or hanging a sheer curtain to filter the sunlight.
Curling leaves: You might be underwatering your plant. Make sure to keep the soil evenly moist by watering when the top inch of soil feels dry to the touch or when a moisture meter reads 4.
Browning leaf tips: Your rattlesnake plant might want more humidity! Try misting your plant more often, setting up a humidifier or humidity tray, or moving your plant to the bathroom. Taking your plant into the bathroom when you shower can also help!
If humidity doesn’t seem to be the issue, it’s possible your rattlesnake plant is having trouble with chemicals in tap water. Try using distilled water or letting water sit out overnight before giving it to your plant so additives like chlorine have a chance to evaporate.
Crispy leaves: If the leaves of your rattlesnake plant are turning brown and crispy, check for nearby vents, drafts, or heaters that may be drying it out. If you find anything, move the plant to a better spot.
If dry air doesn’t seem to be the problem, it’s possible that your plant is severely underwatered. Give your plant a drink and keep a closer eye on the moisture level of the soil next time!
Drooping leaves and stems: Drooping can have a few different causes. If you recently moved or repotted your plant, your plant is probably in shock. Keep caring for it consistently and be patient. It should perk back up within a week or two!
If your plant hasn’t experienced any major environmental changes recently, it might be thirsty. Check the soil, and if it feels a little too dry, give it a drink. Also check for nearby drafts.
Insects: All houseplants, rattlesnake plants included, are susceptible to household pests. If you notice tiny brown or yellow dots on your plant, webbing, sticky residue, or actual insects, you might have an insect problem. Spraying your plant off in the sink or shower can help. Make sure your drainage is excellent! Neem oil-based products can help get rid of the pests and keep them away. We also recommend our Leaf Armor spray to protect the leaves from insects, dust, debris, and pathogens.
Mushy, browning stems: Your rattlesnake plant probably has root rot, a fungal disease that can quickly kill your plant, so it’s important to act fast.
First, repot the plant into a clean pot with fresh soil. You can use a brand-new pot or clean the old one. Make sure to get as much of the old, affected soil out of the root ball as possible. If you see any mushy, smelly, or darkened roots, be sure to trim those away using clean hands and tools.
Once the plant is in fresh soil, make sure it gets sufficient light and the right amount of water. (Err on the light side for a while.) When you do water, use our Root Supplement to help the roots heal and prevent further infection. Avoid fertilizing for a month or so after repotting.
Other Rattlesnake Plant Tips and Facts:
- Dust the leaves regularly to keep them nice and shiny!
- Rattlesnake plants are non-toxic, so this is a good houseplant choice if you have pets or children.
- In the right conditions, rattlesnake plants can grow tiny yellow flowers in the spring! However, this rarely happens indoors.
- Rattlesnake plants can be grown outdoors in U.S. zones 11-12.
In love with rattlesnake plants and ready to branch out? Try these other gorgeous calathea species!
Zebra plant
Zebra plants are known for their oval-shaped light-green leaves with dark-green stripes. The undersides of the leaves are a striking purple, and have a pleasant velvety texture. This is the perfect next step for a rattlesnake plant lover!
Pinstripe plant
As the name suggests, this plant is known for its beautiful dark-green pinstriped leaves. These stripes can also come in white, light green, and even pink or red, with the characteristic purple underside of many calathea species. This plant grows up to 2 feet tall and makes a great medium-sized floor plant.
Rose-painted calathea
The rounded leaves of this variety sport soft pink stripes that resemble paint brush strokes. That is where it gets its name! You’ll also notice a gorgeous pattern of light and dark-green coloring on the top of the leaves. This is one of the most colorful, eye-catching calathea species out there!
Calathea beauty star
This striking calathea has long, lance-shaped leaves with light-green coloring and delicate dark-green striping. It’s easy to see where it gets its name! This plant can also come in light-pink variations. Add this to your collection for a stunning and impressive conversation maker without a ton of work!
Peacock plant
This is another popular member of the calathea genus, and for good reason! It looks very similar to the rattlesnake plant with lance-shaped, dark- and light-green patterned leaves. The leaves are more rounded and less wavy than those of the rattlesnake plant. Still, this will add some fun variety to your calathea collection!
Rattlesnake plants and calatheas in general provide a lot of beauty and color without a lot of work. It’s a great houseplant bang for your buck! With a little practice, you’ll be a pro at caring for these gorgeous plants, and your indoor space will never be the same.
Try these other free resources to level up your houseplant skills!
The Last Houseplant Book You Will Ever Need