How To Propagate Boston Ferns
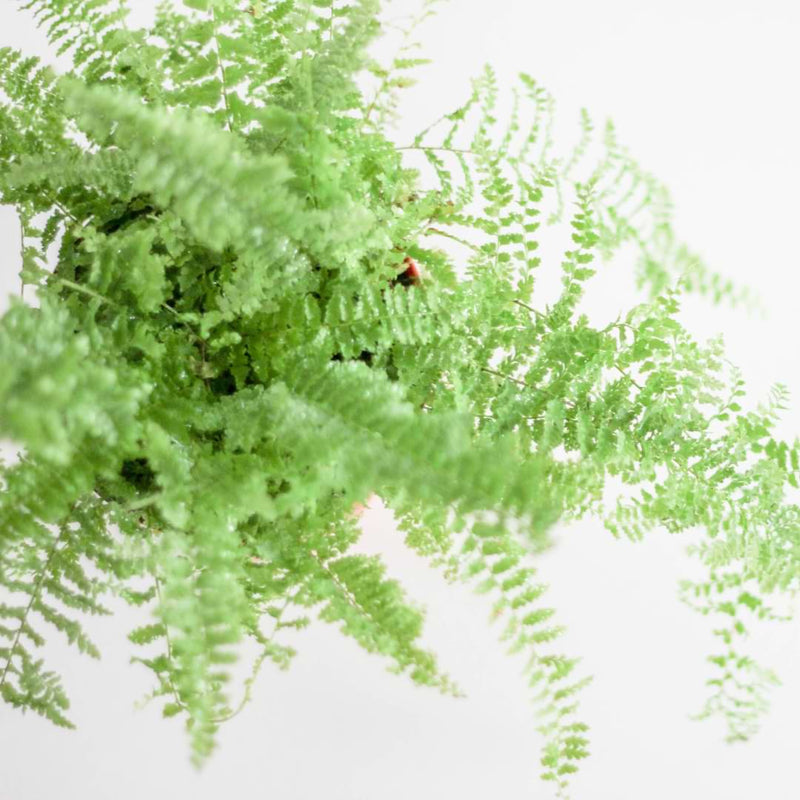
Boston Ferns are a fantastic addition to any indoor or outdoor garden. These lush greens not only bring life and vibrancy to your space but also purify the air around them, and they look gorgeous while doing it. Finding Boston Ferns is easy enough, but propagating them has the potential to give you an endless amount of these beauties for nearly nothing.
Propagation is when you take off a portion of an existing plant, and encourage that part to grow its own roots, turning it into its own plant capable of living on its own. While it may sound like a daunting task, it’s a fairly simple process as long as a few general guidelines are followed.
Before you start propagating your Boston ferns, it is important to have the right tools and equipment on hand. The good news is that you don’t need any specialized equipment or expensive tools to propagate Boston ferns successfully, you likely already have most of what you will need. Gather together this list of tools before propagating your Boston Fern:
After gathering these tools, you are ready to begin propagating your Boston Fern. There are three main ways to propagate this plant, each with their own pros and cons, so keep reading to see which method works best for you and your plant.
One popular method for propagating Boston ferns is through separating runners. Runners are small offshoots that grow from the main plant and can eventually become their own individual plants. Runners will have their own roots at the base of 2-3 fern stems that almost look like a small root ball. These offshoots will continue growing out from the center of the main plant, expanding the reach of the plant.
To separate runners, first locate a healthy fern with several runners growing from it. These runners will be closer to the base of the plant, and are also called stolons. Gently remove the fern from its pot or soil to get a better look at the runner system.
Using clean and sharp gardening shears, carefully cut away any dead or decaying foliage around the base of each runner you want to separate. This will help prevent any potential disease or pests from spreading to new plants. You shouldn’t have to cut the runners away from the plant, but you will want to gently separate all of the roots to ensure your new propagation is able to get all the nutrients it needs to survive.
Next, use your hands to gently tease apart the runners from one another until they come loose. Be sure not to damage any roots in the process. Once separated, it’s ready to be planted in its own pot of clean soil.
Clean off the roots of the newly separated fern runners after you’ve carefully separated them, and place them in their own pot with well-draining potting soil. A soil with plenty of organic matter will ensure your new plant thrives in its new pot.
When placing the runner in its pot, only bury the roots up to where they were originally covered before they were separated from the main plant.

Propagating Boston ferns from root divisions is another effective method of expanding your collection. This technique involves separating the plant’s roots into smaller sections, each containing a portion of the plant’s stem and foliage.
To begin this process, carefully remove the Boston fern from its pot and gently shake off excess soil to expose the roots. Using a clean and sharp knife or garden shears, divide the root ball into several sections, ensuring that each section has healthy leaves and a good root system attached to it.
If there are multiple crowns on the plant, you can choose to divide them as well. Simply use your hands to gently pull apart the crowns until they separate into individual sections.
After the plant is divided, place fresh, well-draining potting soil in each of the pots that will hold the new divisions. Gently place the division in the new pot, and backfill the pot with the same new potting soil until all of the roots are covered with soil.
Water thoroughly, allowing any extra water to drain out of the pot, and your propagation is complete!
Spore propagation is another way to propagate Boston ferns. It involves collecting spores from mature fronds and sowing them in a suitable growing medium. This method requires patience and attention to detail, but it can be a rewarding way to produce new plants.
To collect the spores, wait until the frond has turned brown and dry before cutting it off with scissors or pruning shears. Place the frond in a paper bag or envelope and shake gently to release the spores.
Prepare a sterilized tray filled with sterilized peat moss or sphagnum moss as your growing medium. Sprinkle the spores on top of the soil, being careful not to overcrowd them. Cover with plastic wrap or glass pane to maintain moisture levels.
Place your tray in indirect light and keep at around 70°F (21°C) temperature range for optimum germination conditions. Mist regularly using distilled water spray bottle until you see new growth emerging from surface soil after several weeks. You will need a lot of patience for this method, because although you may see growth in a few weeks, it could take months to see anything beginning to develop.
Once they’ve grown into small fernlets, transfer them individually into pots containing well-draining soil mixtures such as a perlite-vermiculite combination for optimal root development rates!
Boston Ferns aren’t too difficult to care for, but a newly propagated plant will need a little extra care and attention until it is growing and thriving.
Boston Ferns thrive in bright, indirect light, so finding them a position either in your home or outside that keeps them out of direct sunlight will allow them to thrive. Direct sunlight can burn their delicate fronds, but if they only receive early morning sun, they should be just fine, as it’s much gentler on plants than the hotter afternoon sun.
If keeping your Boston Fern inside, an east-facing window is ideal for this purpose as they provide gentle morning sun that won’t damage the plant. If you don’t have an east-facing window available, consider placing your fern near a north or west-facing window instead. However, keep in mind that these directions may require some protection from harsh afternoon sun exposure.
Another option is to use artificial lighting sources such as fluorescent bulbs or LED lights if natural light isn’t sufficient for proper growth.
In addition to finding the right location for your fern’s needs, make sure you rotate it every few weeks so all sides get equal exposure to sunlight and prevent any one side from becoming too leggy or thin due to uneven lighting distribution.
These plants thrive in temperatures between 60-75°F, so try to keep them in a warm but not hot environment. In terms of humidity, Boston ferns prefer high levels of moisture. If the air around your plant is too dry, it will start to wilt and even die over time. To increase humidity levels, you can place a humidity tray nearby or use a humidifier. Avoid placing them near heating or cooling vents as they can cause sudden temperature and humidity changes.

The type of soil you use is very important when caring for your newly propagated Boston Fern. The ideal soil for this plant should be well-draining, porous, and rich in organic matter. A good mix would include peat moss, perlite or vermiculite, organic compost, and sand or grit.
Peat moss is an essential ingredient in most potting mixes because it holds moisture and nutrients while still allowing air to circulate around the roots. Perlite or vermiculite add an extra layer of drainage to the mix by holding onto water without becoming waterlogged. The organic compost will give your fern all the nutrients it needs before it is established enough to be regularly fertilized. Sand or grit helps prevent compaction of the soil and allows excess moisture to drain away from the roots.
A regular watering schedule will help your newly propagated Boston Fern grow a strong set of roots and allow it to thrive. These plants prefer a consistently moist soil, but be careful not to overwater it, as that can be just as harmful as letting the soil dry out completely.
To ensure your Boston Fern gets enough water without drowning it, make sure the soil is well-draining, and the container has plenty of drainage holes. When watering, aim to keep the soil evenly moist but not soggy. You can also use a moisture meter to track how much water your plant needs before each watering.
During hot summer months or in dry indoor environments, you may need to water your fern more frequently than during cooler seasons or in humid rooms. In addition to regular watering, misting your Boston Fern once a day can also help maintain adequate humidity levels around its leaves.
Fertilizing Boston ferns is an important step in maintaining their health and promoting growth. However, for a newly propagated plant, it’s important to follow some steps to ensure your plant stays healthy and strong.
When choosing a fertilizer for your Boston fern, look for one with balanced NPK (nitrogen, phosphorus, potassium) levels. Too much nitrogen can lead to lush foliage but weak stems, while too much phosphorus can inhibit the plant’s ability to absorb other nutrients.
An excellent option for fertilizers is actually this plant food that is applied every time you water your plant, ensuring it gets bite-size amounts of nutrients, making it easier for your plant to absorb those nutrients, and limiting the risk of fertilizer burn in your plant. This is especially important for newly propagated plants who are still adjusting to their own pots.
When you first fertilize your propagated fern, you’ll want to dilute the fertilizer strength by ½ of what is the normal recommended amount on the bottle. This will simply ensure that your plant adjusts well to the additional nutrients it will now regularly receive. From there, you can slowly transition to regular strength feedings.
Propagating Boston ferns is a rewarding way to multiply your plant collection and share these lush, green beauties with friends. By using the techniques we have outlined above, you can successfully propagate Boston ferns and ensure that they thrive in their new environment. But even after all your hard work, some problems may arise. Below are some of the most common problems your fern may face after being propagated.
Yellowing leaves: One of the most common issues is yellowing leaves or fronds turning brown. This could be due to overwatering or underwatering, so be sure to monitor soil moisture levels carefully.
Pests: Another issue could be pests such as mealybugs or spider mites, which can damage foliage and cause wilting. Regularly check for signs of infestation and treat them immediately with insecticidal soap or neem oil.
Disease: Hopefully, your propagated fern does not carry a disease or infection over from its parent plant, which is the main reason you only want to propagate healthy plants. But sometimes it does happen, and you’ll want to treat it quickly to help your delicate plant survive. Using a bactericide, fungicide, or root supplement may help your plant recover from certain diseases.
Successful propagation of your Boston Fern is one of the easiest ways to fill your home with this beautiful plant, so grab your fern and give it a try!
Looking for more houseplant info? We highly recommend our super informative (and FREE!) Houseplants for Beginners Webinar. Check out our community of other plant lovers in our Facebook group. And if you’re looking for handy go-to reference for all your houseplant needs, check out our The Last Houseplant Book You Will Ever Need.

We are an Amazon Certified Small Business! Small businesses are the backbone of the US economy; they create jobs and drive innovation. We appreciate YOU helping small businesses on Amazon!